Stand mixers are sold as cake machines with a bread hook thrown in the box, and that is exactly how most of them behave the first time you drop a stiff dough into the bowl. The motor slows, the head starts to walk across the counter, and you catch a warm electrical smell that was not there when you were whipping cream.
That smell is the machine telling you the truth. I have heard it from cheap mixers and from expensive ones, and the difference is almost never the price. It is how the dough was loaded and how the machine was run.
Learning how to knead bread dough in a stand mixer is mostly a matter of respecting two things: the hydration of the dough and the duty cycle of the motor. Get those right and a modest mixer will turn out a decent loaf every week for years. Get them wrong and a heavy-duty machine will burn out on a Saturday morning.
This is the workflow I use in my own kitchen and teach in my classes, plus the two pieces of gear that make the station work.
Why you should trust me
I have been baking for twenty years, ten of them running a bakery in Vermont before I moved into teaching bread classes and testing home equipment. I kneaded dough by hand until my wrists gave out, which is how I ended up caring so much about motors.
There are three mixers in my kitchen: the lift-bowl machine that survived a decade of weekly bread, a roller mixer that handles double batches, and a cheap one I bought to see whether it deserved the hate. It did.
My standard for any mixer is the same one I use in class. One real bread bake, a stiff dough, and a hand on the motor housing at the ten minute mark. If it smells hot, it is not powerful enough for what you bought it for. No cake mix counts.
How I picked and how I tested
Everything below is judged against a single question: does it help you put a good loaf on the counter without wrecking the machine?
For a mixer, that means looking past the bowl size on the box and asking what happens under load. A mixer that whips cream without effort can still stall on bread dough, because whipping and kneading are different jobs. The bowl number is marketing. The motor behavior is the product.
For a knife, the test is simpler. Scoring a proofed loaf takes a blade that is genuinely sharp and a handle you can control with one hand while the other hand steadies the dough. A dull blade drags, tears the surface, and deflates the loaf you spent two days building.
So I do not rank by wattage or by piece count. I rank by what the tool does on the bench, at the moment the dough is ready and the oven is hot.
What you need before the dough goes in
Two things matter before the flour hits the bowl: something that can knead without stalling, and something sharp enough to cut and score what you bake.
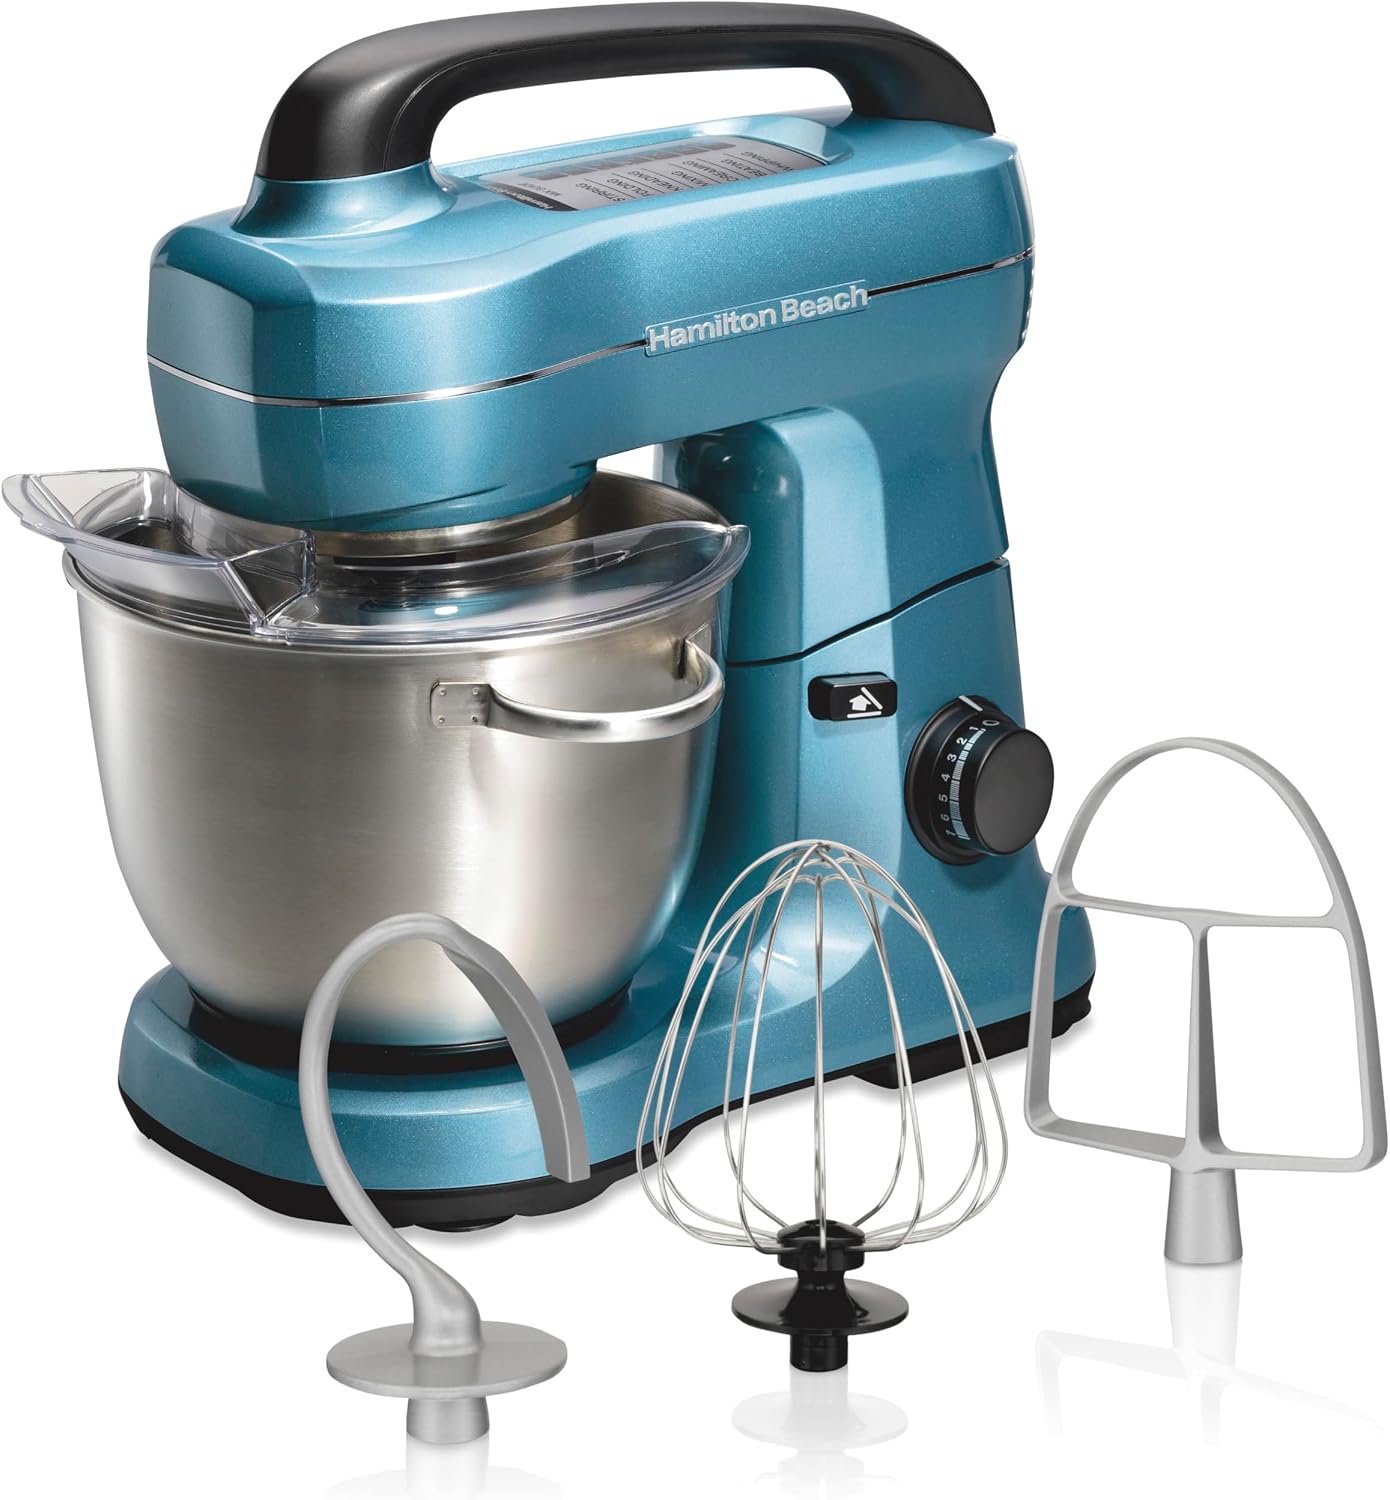
The mixer: Hamilton Beach 4 Qt Electric Stand Mixer With 7 Speeds, Easy-Carry Handle
 Visit on Amazon →
This is the class of mixer most people actually start with, and there is nothing wrong with that. Four quarts, seven speeds, and a carry handle that matters more than it sounds, because a mixer that is easy to move is a mixer that gets used. It lives on the counter in a small kitchen or comes out of the cupboard without a fight.
The honest framing: this is a single-loaf machine. Run it at the low speeds for bread, keep the dough in the range it was built for, and it will do the job for cookies, cake batter, and a weekly white loaf. Push it into stiff, low-hydration dough or a double batch and you are asking it to do work it was not designed for. That is not a knock on this mixer. It is a knock on every mixer in this price band, and it is the reason the steps below matter.
Flaws but not dealbreakers: Four quarts fills up faster than the box suggests once dough starts climbing the hook. If you regularly bake for a crowd, you will want more bowl.
Anyone baking one or two loaves a week, or mixing mostly cakes and cookies with the occasional bread day, will be well served here.
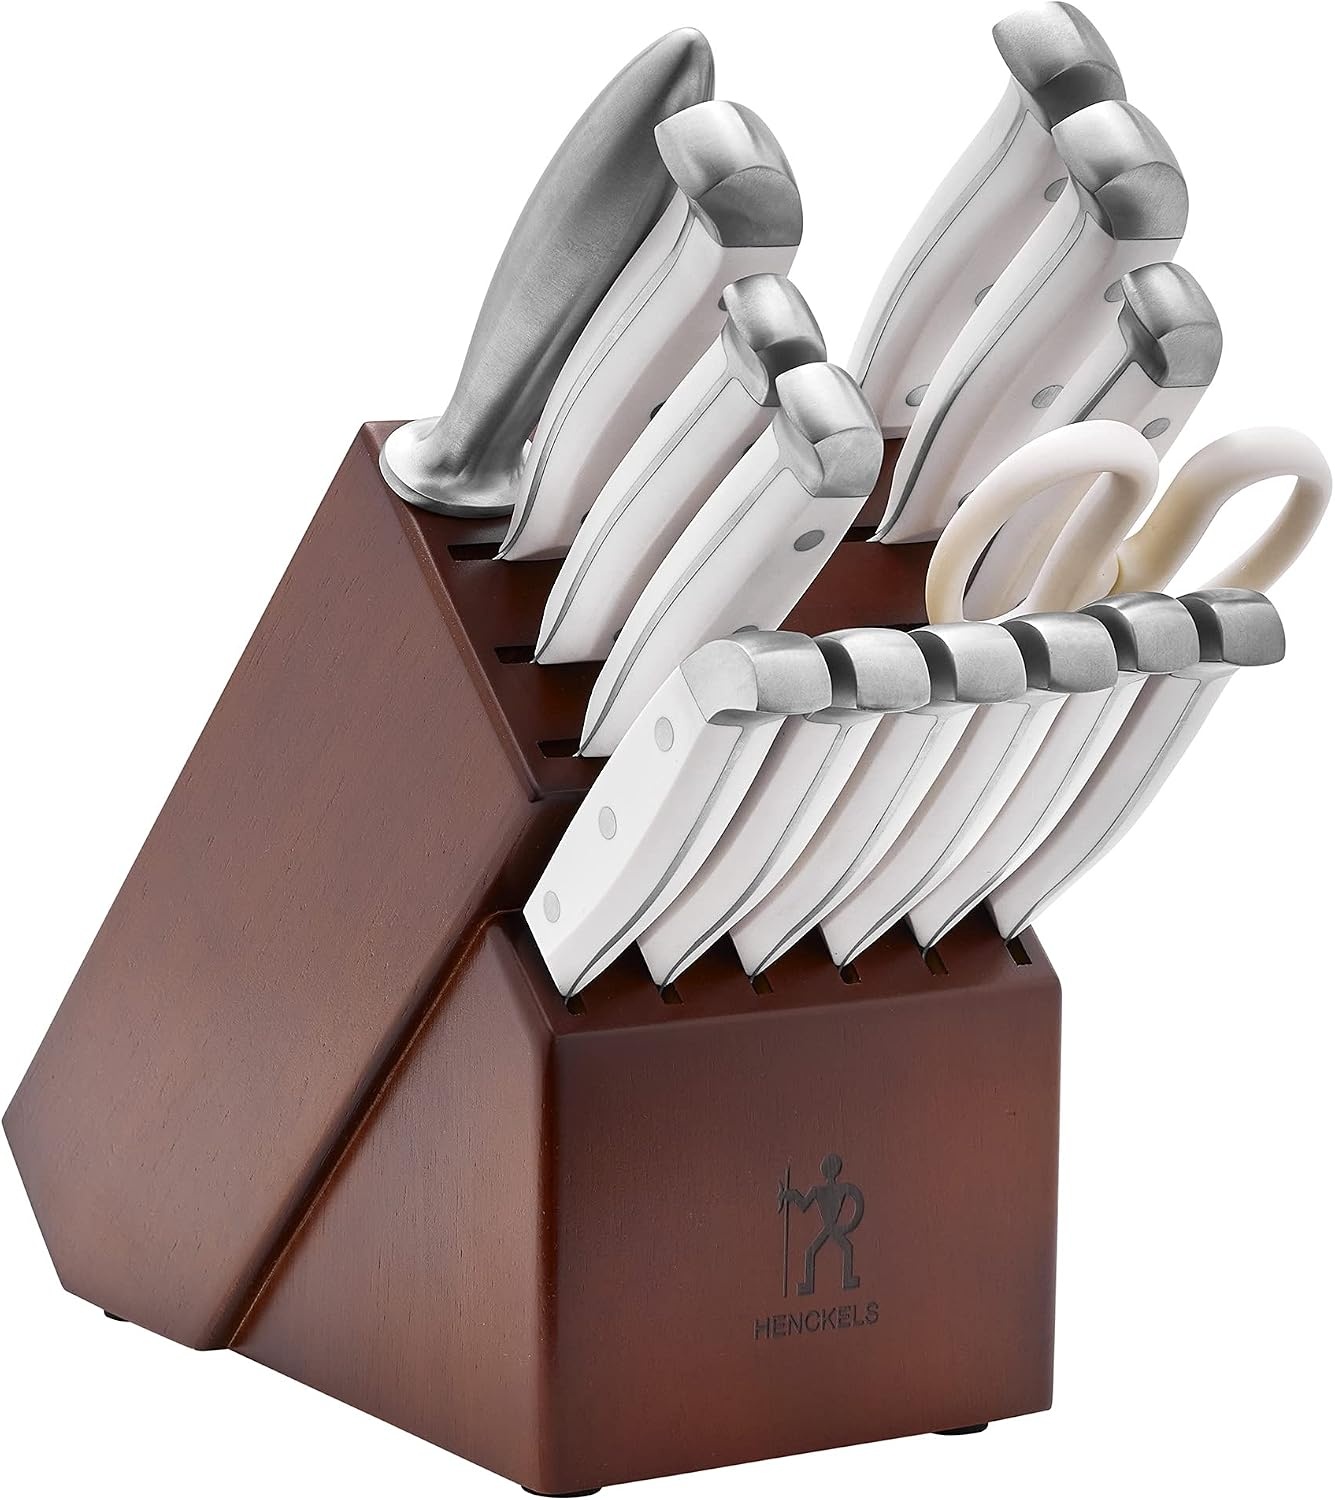
The blade: Henckels Statement 15-Pc Knife Set, Razor-Sharp, German Engineered, White
 Visit on Amazon →
Fifteen pieces sounds like overkill until you have tried to score a wet boule with a paring knife. A proper set gives you a small blade for trimming and slashing, a long blade for portioning the finished loaf, and a block that keeps everything where you can find it. German engineered steel, white handles, and a set that covers the whole bench instead of one job.
The part that matters for bread is sharpness out of the block and the discipline to keep it. A scoring blade should cut the surface in one clean pass and let the dough open in the oven. If it drags, you get a torn, lopsided loaf.
Flaws but not dealbreakers: Fifteen pieces means fifteen things to maintain and store. If your counter is already crowded, count the block as part of the footprint.
Anyone setting up a kitchen from scratch, or replacing a drawer of mismatched knives, gets the most value here.
The actual kneading workflow
Now the part you came for. This works with any stand mixer that has a dough hook, from a four-quart starter machine to a lift-bowl workhorse.
Step one: Weigh everything, including the water. Volume measurements lie, especially with flour. A cup of flour can swing by twenty percent depending on how it was scooped, and that swing is the difference between a dough the mixer can handle and one it cannot.
Step two: Mix on the lowest speed until the flour disappears. Thirty seconds to a minute. You are not kneading yet, you are combining. Running a stiff dough at high speed is how mixers die.
Step three: Let the dough rest before you knead it. Cover the bowl and walk away for twenty to thirty minutes. The flour hydrates, the gluten starts to organize on its own, and the mixer has far less work to do when you come back. This one habit does more for your motor than any upgrade.
Step four: Knead on low, not medium. Speed two on most machines. Bread dough wants torque, not velocity. If the machine labors and slows, you are above the speed it can sustain.
Step five: Watch the dough climb the hook. A good dough hook gathers the dough and works it against the bowl. If the dough is just spinning around the hook like a tire, it is too wet or you are going too fast. Add flour a spoonful at a time.
Step six: Put a hand on the motor housing at ten minutes. This is the test I trust most. Warm is normal. Hot is a warning. Smell it. If there is a hot electrical note, stop, let the machine cool, and finish the knead by hand. Ten minutes of hand kneading beats a burned-out motor.
Step seven: Stop at the windowpane, not at the timer. Pull off a small piece and stretch it. If it goes translucent without tearing, the gluten is developed. If it tears into a ragged hole, give it two more minutes. The clock is a guide, the dough is the answer.
Step eight: Finish by hand if the dough fights the machine. Stiff, low-hydration dough and big batches are hand work. Turn it out, push it with the heel of your palm, fold it, turn it, repeat. The mixer is a tool, not a religion.
Where most people go wrong
The most common mistake is trusting the bowl capacity on the box. A bowl holds what it holds in volume. Dough is a different question. Once dough climbs the hook, it is not being kneaded, it is being thrown around, and that is when the machine stalls and the head starts to wobble.
The second mistake is walking away. Bread dough is not cake batter. Two minutes of unattended mixing at the wrong speed can move a machine across the counter or burn a motor that would have been fine.
The third is running the machine hot. Back-to-back batches with no cool-down between them is how home mixers die young. Let it rest between loaves.
And the fourth is dull knives. A torn score line means the loaf will not open properly in the oven, and a dull blade on a baked loaf crushes the crumb you worked for. Hone often, and replace what will not take an edge.
The competition and why it lost
Hand kneading is not the enemy. It is free, it teaches you what dough feels like, and for a single loaf it takes about ten minutes once you know what you are doing. If you are baking once a month, do it by hand.
No-knead methods are the other honest option. They trade time for effort, and for lean sourdough they work beautifully. They do not work for brioche, and they will not teach you what a properly developed dough looks like on the hook.
Bread machines knead in a closed box and bake in the same box, which is convenient and limiting. They cannot handle the range of doughs a stand mixer can, and the blade in the pan is not a dough hook.
The lift-bowl machines I keep for heavy bread are a category of their own: sturdier under stiff dough, heavier on the counter, and priced like the investment they are. If you bake bread every week and want one machine to carry you for a decade, that is where you look. If you are starting out, the mixer in this article plus good technique will take you a long way.
What this all costs
Both of these are one-time purchases, and that is the point. A stand mixer and a knife block are tools you amortize over years, not consumables you replace each season.
Do the math by loaves, not by list price. A mixer that turns out one loaf a week for five years is 260 loaves. A knife set that scores and slices every one of them is doing the same work. The gear cost is spread thin when you actually bake.
The real cost is the dough you throw away learning. Bad hydration, overmixed dough, a torn score line, a loaf that never opened. Every one of those is a lesson, and every one of them is cheaper than replacing a burned-out motor.
Check current Amazon price on both, then start with a simple white loaf. Weigh the flour, mix on low, let it rest, and keep your hand on the motor housing. Your kitchen will smell like bread instead of hot wiring, and that is the whole job.